

Table of Contents
- Signs of a Clogged Vacuum Filter
- Best Tools for Cleaning Vacuum Filters
- Step-by-Step: How to Clean Vacuum Filters for Better Suction
- How Often to Wash Vacuum Filter
- Filter Material Compatibility: HEPA, Foam, and Paper
- When to Clean vs. Replace Your Vacuum Filter
- Post-Cleaning Performance Testing and Odor Removal
- Frequently Asked Questions
Last Updated: September 18, 2026
Signs of a Clogged Vacuum Filter
A clogged vacuum filter is the most common reason a vacuum loses suction, and it shows up in three ways: weaker airflow, visible debris, and a musty smell. Learning how to clean vacuum filters for better suction starts with spotting these warning signs early. This guide from WowHaul walks through each one so you can fix the problem before it damages the motor.
Suction Loss and Reduced Airflow
The first sign is a drop in suction power. You push the vacuum over the same crumbs twice, and nothing happens.
Visible Debris Buildup and Odors
Look at the filter itself. A gray or brown coating means heavy dust accumulation.
Check for these signs:
- Visible dust caked on the surface
- A musty or sour smell when running
- Suction loss that gets worse over time
- The vacuum overheating or shutting off
Best Tools for Cleaning Vacuum Filters
You don't need a big toolkit. A few simple items handle most filter types safely.
Here's what to gather:
- Mild dish soap: cuts grease and grime without damaging filter material
- Soft-bristled brush: an old toothbrush works well for pleated paper and foam
- Warm water: never hot, which can warp synthetic foam
- A clean towel or drying rack: for air-dry time
- A trash bag: for tapping out loose debris first
Step-by-Step: How to Clean Vacuum Filters for Better Suction
Follow these steps in order. Rushing the process is how filters get damaged.
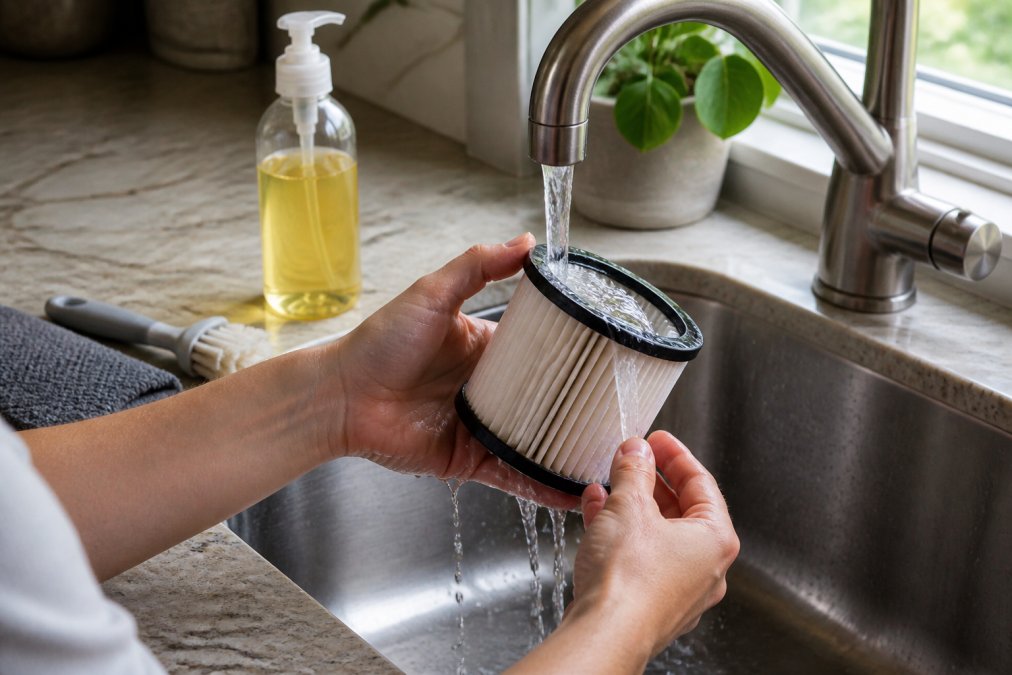
Removing and Inspecting the Filter
Unplug the vacuum first. Always.
Open the filter housing and pull out the filter. Check the manual if you can't find it. Most models have the filter near the dustbin.
Washing vs. Dry Cleaning Methods
Not every filter can get wet. This is where most people make a costly mistake.
Drying Time Requirements
A wet filter is a dead filter. Moisture damage causes mold and blocks airflow.
How Often to Wash Vacuum Filter
Most homes should wash or clean the vacuum filter every one to three months. Homes with pets or heavy dust need it more often.
Use this schedule as a starting point:
| Situation | Clean Frequency | Check Frequency |
|---|---|---|
| No pets, light use | Every 3 months | Monthly |
| One pet, weekly vacuuming | Every 4-6 weeks | Every 2 weeks |
| Multiple pets or allergies | Every 2-4 weeks | Weekly |
| After deep cleaning or renovations | Immediately after | After each use |
Filter Material Compatibility: HEPA, Foam, and Paper
| Filter material | Safe method | Why it works | Failure mode if done wrong |
|---|---|---|---|
| HEPA (washable, labeled) | Warm water rinse, air-dry 24 hours | Synthetic media is bonded to resist water | Rinsing a non-washable HEPA collapses the pleats and breaks the seal |
| HEPA (non-washable) | Tap out debris, soft-brush the surface | Dry media relies on pleat spacing for airflow | Water swells the media, pleats stick together, airflow drops permanently |
| Synthetic foam | Warm water, mild soap, squeeze gently | Open-cell foam recovers shape after gentle compression | Wringing tears the cell walls and creates permanent gaps |
| Natural-fiber or felt | Dry clean only, soft brush | Fibers mat together when wet and don't re-loft | Washing compacts the fiber, blocking airflow |
| Pleated paper | Tap over a trash bag, soft brush | Paper pleats hold dust on the surface | Any moisture warps the pleats and ruins the housing seal |
| Electrostatic media | Dry clean only, low-suction vacuum | Charge holds fine particles; water strips the charge | Washing removes the electrostatic charge and the filter stops trapping fine dust |
- The filter housing label or the molded stamp on the filter frame.
- The owner's manual filter section, most list the part number and whether it is washable.
- The manufacturer's website using the model number on the vacuum's rating plate.
Material-specific rules that prevent damage:
- Synthetic foam: squeeze, never wring. Wringing stretches the cell structure and the foam never seals against the housing again.
- Natural-fiber and felt: never submerge. Water mats the fibers and they don't re-loft, so airflow stays restricted even after drying.
- Pleated paper: never rinse, even briefly. A few seconds under the tap is enough to warp the pleats.
- Electrostatic media: skip water entirely. The charge that traps fine dust is what you're paying for, and water strips it.
- Washable HEPA: rinse from the clean side out. Rinsing from the dirty side drives particles deeper into the media.
When in doubt, dry clean. Tapping and brushing removes the bulk of the debris without risking the media, and you can always escalate to a wet clean once you've confirmed the filter is rated for it.
A note on cleaning agents and filter integrity. Mild dish soap is the safe default because it cuts grease without leaving a residue that traps dust. Avoid anything with bleach, ammonia, citrus solvents, or fabric softener, these can degrade foam cell walls, strip electrostatic charge, and leave a film that shortens the time between cleanings. If you want a lower-impact option, a diluted solution of mild castile soap and warm water cleans as effectively as dish soap and rinses clean without surfactants lingering in the media.
When to Clean vs. Replace Your Vacuum Filter
Cleaning works until it doesn't. Every filter has a life cycle, and eventually it needs replacing.
Clean your filter when it's clogged but still intact. Replace it when:
- The material is torn, stretched, or cracked
- Suction stays weak after a full clean
- The filter no longer fits snugly in the housing
- It smells musty even after washing and drying
Post-Cleaning Performance Testing and Odor Removal
Most guides stop at "put it back and see if it works." That's not a test, it's a guess. This section gives you a repeatable way to confirm the cleaning actually restored suction, plus odor-removal methods that won't damage the media.
Run a Before-and-After Suction Test
Do this test before you clean and again after the filter is fully dry and reinstalled. Same vacuum, same surface, same technique, otherwise the comparison means nothing.
The rice test (works on any vacuum):
- Spread one cup of uncooked rice on a hard floor in a single even layer.
- Make one slow pass over the rice with the vacuum at its normal height setting.
- Count how many seconds it takes to pick up the full cup.
- Record the number. Repeat after cleaning and compare.
The palm test (quick check):
What the Results Tell You
| Result | Likely cause | Next step |
|---|---|---|
| Suction clearly stronger after cleaning | Filter was the bottleneck | Resume normal schedule |
| Suction unchanged | Blockage elsewhere | Check hose, brush roll, and dustbin |
| Suction briefly better, then drops | Filter still partially clogged or damaged | Re-clean or replace the filter |
| Suction worse than before | Filter reinstalled wrong or still damp | Reseat the filter, confirm it's fully dry |
Odor Removal Without Damaging the Filter
Odors come from bacteria and organic residue trapped in the media. The goal is to neutralize them without adding moisture or chemicals that degrade the filter.
For dry-clean-only filters (paper, electrostatic, natural fiber):
- Sprinkle a thin layer of baking soda over the filter surface and let it sit for one hour, then tap it off outdoors. Baking soda absorbs odor molecules without adding moisture.
- Place the filter in a sealed container with an open box of baking soda overnight. This works well for musty smells that persist after dry cleaning.
- Never spray liquid air freshener, vinegar, or essential oils directly on the filter. Liquids warp paper pleats, strip electrostatic charge, and can leave a residue that traps dust faster.
For washable filters (foam, washable HEPA):
- Add one tablespoon of baking soda to the warm water rinse. It neutralizes odor at the source instead of masking it.
- For stubborn odors, soak the filter in a diluted solution of one part white vinegar to four parts warm water for 15 minutes, then rinse thoroughly until the water runs clear and the vinegar smell is gone. Vinegar is safe on foam and washable HEPA but should never touch paper or electrostatic media.
- Dry completely, 24 hours minimum, before reinstalling. A damp filter reintroduces the musty smell within days.
For the vacuum itself, not just the filter:
- Wipe the dustbin with a damp cloth and mild soap, then dry it fully.
- Check the hose for trapped debris, a clogged hose holds odor and mimics a dirty filter.
- Replace the filter if the smell returns within a week of cleaning. Persistent odor usually means organic material has penetrated the media beyond what cleaning can reach.
If suction is still weak after cleaning and the suction test confirms it, the problem isn't the filter. Check the hose, brush roll, and dustbin for blockages. A clogged hose mimics a dirty filter almost exactly, and it's the most common reason a freshly cleaned filter doesn't restore performance.
Frequently Asked Questions
How do I know if my vacuum filter needs cleaning?
Watch for signs of a clogged vacuum filter: weaker suction power, visible dust accumulation on the filter surface, a musty odor when you vacuum, or fine particulate matter escaping back into the air. If your vacuum requires multiple passes over the same spot or feels warmer than usual, debris buildup is likely restricting airflow. Check your filter after every three to five uses, especially if you have pets or allergies.
Can you wash vacuum filters with water?
Only washable filters should touch water. Check your manual or look for a water-drop symbol on the filter housing. HEPA filters labeled non-washable, pleated paper filters, and some synthetic foam types will lose filter integrity if submerged. For washable filters, rinse with lukewarm water and mild dish soap, then squeeze gently. Never agitate aggressively or use hot water, which can warp the filter material.
How long should a vacuum filter dry before putting it back?
Give your vacuum filter at least 24 hours to air-dry completely before reinstalling it. Placing a damp filter back into the vacuum can cause moisture damage to the motor and promote mold growth inside the filter housing. Set the filter on a drying rack in a well-ventilated area, not in direct sunlight. If you need to vacuum before the filter is dry, keep a spare filter on hand so you are never tempted to reinstall a wet one.
How often should you replace vacuum filters versus cleaning them?
Washable filters typically last six to twelve months with regular cleaning. Replace them sooner if you notice tears, permanent discoloration, or suction loss that does not improve after cleaning. Non-washable HEPA filters should be replaced every three to six months, depending on use. If you vacuum daily or have multiple pets, shorten that interval. A fresh filter restores airflow and protects your vacuum motor from strain.
A vacuum that loses suction wastes your time and wears out faster. WowHaul curates practical finds for everyday living, including tools and products that make home care simpler and routines stronger. If you want gear that supports a cleaner, more efficient home, explore the WowHaul collection and find items built for real life.