

Table of Contents
- Why Pet Owners Need a Different Maintenance Routine
- How to Remove Pet Hair From Robot Vacuum Brushes
- The Best Robot Vacuum Maintenance Schedule for Pet Owners
- Essential Tools for Robot Vacuum Cleaning
- Filter, Dustbin, and Debris Management
- Sensor Cleaning and Navigation Accuracy
- Post-Accident Cleanup and Long-Term Component Care
- Frequently Asked Questions
Last Updated: September 10, 2026
Why Pet Owners Need a Different Maintenance Routine
If you share your home with a shedding dog or cat, your robot vacuum is working a second job. Pet hair, dander, and tracked-in debris push every component harder than a pet-free household ever will, which is why robot vacuum maintenance tips for pet owners look different from the standard advice in the manual.
The core issue is hair entanglement. Long strands wrap around rotating parts instead of landing in the dustbin, and that buildup slowly strangles suction power and air flow efficiency. A maintenance routine built for pet owners has to target brushes, filters, and sensors far more often than the manufacturer's default schedule suggests.
How to Remove Pet Hair From Robot Vacuum Brushes
Removing pet hair from robot vacuum brushes takes about five minutes per session: flip the unit over, cut through wrapped strands with scissors, then pull the debris free by hand. Do this weekly, and you'll protect both suction power and the brush motor. Skip it, and you'll notice the difference within a month.
Tackling Tangled Roller Brushes
The main roller is where hair entanglement gets serious. Hair wraps tight around the axle, and rubber or bristle fins can't agitate carpet properly once they're bound up. Turn the vacuum off, invert it, and run your fingers along the roller to find the pinch points. Small scissors work better than pulling, since yanking stretches the bristles.
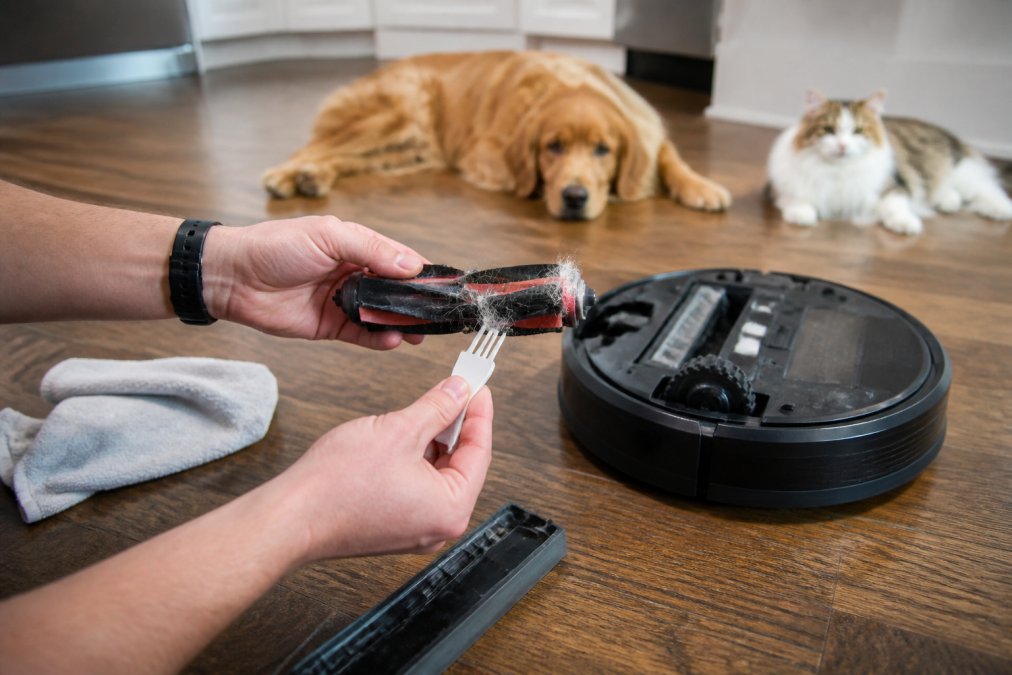
Tangle-free brushes cut down on this chore considerably, but they don't eliminate it. Hair still collects at the end caps where the roller meets the housing.
Side Brush and Caster Wheel Care
The side brush sweeps debris toward the intake, and pet hair loves to wind around its spindle until the bristles splay outward. Pull the brush off, clear the base, and straighten any bent bristles by hand. The front caster wheel is the most overlooked part on the whole machine: hair wraps the axle, the wheel stops swiveling, and your robot starts dragging instead of steering. A pair of tweezers handles this in under a minute.
The Best Robot Vacuum Maintenance Schedule for Pet Owners
Most guides hand you a daily/weekly/monthly table and call it a schedule. That misses the real variable in a pet household: your pet's activity pattern. A robot that runs while a heavy shedder is napping collects a different load than one that runs mid-zoomies, and the maintenance cadence should follow the load, not the calendar.
Build the Schedule Around Your Pet, Not the Clock
Start by mapping two things: when your pet sheds most (grooming sessions, seasonal coat blows, post-bath shake-offs) and when your pet is least likely to be underfoot. Then set the robot to run immediately after those high-shed windows. A run right after a brushing session pulls the loosened undercoat off the floor before it migrates into upholstery and air vents.
A practical pattern many pet owners land on:
- High-shed periods (spring/fall coat blow, post-grooming): run daily, clear the roller every other day, tap the filter every third run.
- Moderate shedding: run every other day, clear brushes twice a week, tap the filter weekly.
- Low shedding or short-coated breeds: run two to three times a week, full brush and filter service weekly.
Daily, Weekly, and Monthly Tasks
| Frequency | Task | Time Needed | Why It Matters |
|---|---|---|---|
| Daily | Empty dustbin, check for hair clogs at the intake | 2 minutes | Restores air flow efficiency before the next run |
| Every 2-3 days (high shed) | Cut hair off the roller and side brush | 5 minutes | Prevents axle wrap and bristle splay |
| Weekly | Tap out or rinse (if washable) the filter, wipe sensors | 10 minutes | Protects suction and navigation accuracy |
| Monthly | Inspect caster wheel, drive wheels, charging contacts, dock | 20 minutes | Catches wear before it becomes a repair |
| Quarterly | Assess filter, brush, and battery condition against replacement triggers | 15 minutes | Prevents silent performance decay |
A simple rule: if you can see hair on the roller, it's already overdue. The schedule above is a baseline, not a ceiling.
Scheduling Around Pet Activity
Two scheduling mistakes cost pet owners the most performance:
- Running while the pet is active. A dog or cat following the robot kicks up hair and dander the vacuum just collected, and can knock it off course. Schedule runs for nap windows or while the pet is in another room.
- Running once, long, instead of twice, short. A single marathon cycle packs the filter and roller harder than two shorter cycles with a bin empty in between. If your model supports zone cleaning, target the pet's favorite spots on a separate short cycle.
If your robot has a scheduling app, use it to stagger runs so the bin and filter get serviced between cycles rather than after a full-house pass.
Essential Tools for Robot Vacuum Cleaning
A small kit makes this work far easier than improvising. Keep these within reach:
- Small scissors or seam ripper for cutting wrapped hair
- Tweezers for caster wheels and sensor recesses
- A stiff-bristle brush for filter screens
- Microfiber cloths for sensors and charging contacts
- A spare filter so you're never waiting on a replacement
None of these are specialty items, and a dedicated kit means you'll actually do the maintenance instead of postponing it. U.S. EPA guidance on indoor air quality and pet dander explains why filter upkeep matters beyond machine performance: a clogged filter recirculates fine particles back into the room instead of trapping them.
Filter, Dustbin, and Debris Management
A clogged filter is the single biggest cause of lost suction power, and pet dander clogs filters faster than ordinary dust. Empty the dustbin after every run in a pet household, and tap the filter against a trash can weekly. Most filters need replacement every few months with regular pet hair exposure, though heavy shedders can burn through them faster.
HEPA filtration traps the fine dander that triggers allergies, but only while the filter is clean. Once the pleats are packed with hair and dust, air flow efficiency drops and allergen reduction stops. If your vacuum has a debris extraction dock, check the base bag or canister on the same schedule.
Sensor Cleaning and Navigation Accuracy
Dirty sensors cause more "my robot is broken" complaints than any mechanical failure. Cliff sensors, obstacle avoidance sensors, and the camera or lidar window all rely on clear line of sight. Wipe them with a dry microfiber cloth monthly, and check the charging contacts on both the robot and the docking station.
Sensor calibration isn't something you perform manually on most models, but smart mapping degrades when sensors are smudged. If your robot starts bumping furniture it used to avoid or missing rooms on its map, clean the sensors before assuming the hardware failed. Consumer Reports guide to robot vacuum testing notes that navigation consistency is one of the most common failure points in long-term testing.
Post-Accident Cleanup and Long-Term Component Care
Accidents happen, and how you respond determines whether your vacuum survives them. If your robot runs through pet waste, stop the cleaning cycle immediately and remove the unit from the floor. Do not let it return to the dock, that spreads contamination onto the charging contacts and base, and the residue can bake onto the contacts and cause charging faults.
The Post-Accident Protocol
Cleanup follows a strict order, and skipping a step usually means a lingering odor or a repeat clog:
- Remove and discard the dustbin contents outside, in a sealed bag.
- Take off the roller, side brush, and caster wheel, then wash them separately with warm water and a pet-safe enzymatic cleaner. Enzymatic cleaners break down the proteins in urine and waste that ordinary soap leaves behind.
- Wipe the chassis, wheels, bumper, and sensors with a damp cloth and the same cleaner. Pay attention to the underside and the brush housing, where residue hides.
- Inspect the filter. If waste reached the filter, replace it, do not try to wash a contaminated dry-only filter, and do not reuse a washable one that has absorbed waste.
- Let every part dry completely before reassembly. Moisture in the brush housing promotes odor and can damage the motor.
- Run the vacuum on a hard floor with the brushes removed to confirm no residue remains and no odor lingers.
If the accident involved diarrhea or a pet on medication, treat the affected area as a biohazard: wear gloves, use a fresh cloth, and discard the cloth rather than laundering it with household items.
When to Replace Pet-Specific Wear Items
Pet hair accelerates wear on specific components, and replacing them on a pet-adjusted schedule beats waiting for failure. These are the triggers most owners miss:
- Side brushes: replace when bristles splay outward, curl, or stop sweeping debris toward the intake, typically every 3 to 6 months in a heavy-shed home, sooner if the brush runs on thick carpet.
- Main roller or brush: replace when the rubber fins are nicked, the bristles are matted flat, or hair has scored the axle. A roller that no longer agitates carpet is costing you pickup on every pass.
- HEPA filter: replace every 2 to 3 months with regular pet exposure, and immediately after any waste contamination. A packed HEPA filter stops trapping dander and starts recirculating it.
- Battery: capacity fades faster when the vacuum runs longer cycles to compensate for weak suction. If runtime has dropped noticeably and filters and brushes are clean, the battery is the likely culprit.
- Drive wheels and caster: replace when the wheel no longer swivels freely or the tread is worn smooth, which causes the robot to drag or miss areas.
A simple tracking method: write the install date on each replacement part with a permanent marker, or log it in your robot's app if it supports part-life tracking. That turns "it feels slow lately" into a concrete replacement decision.
Protecting Battery and Motor Life
Battery health suffers when the vacuum runs longer cycles to compensate for weak suction, so keeping filters and brushes clean indirectly extends battery life. Two habits help most: let the robot finish its cycle and return to the dock rather than interrupting it repeatedly, and avoid storing the unit in extreme heat or cold, which stresses lithium-ion cells. If your model offers a battery-care or charge-limit setting, use it.
FTC guidance on product care and warranty claims is worth reviewing if an accident or wear issue ever turns into a warranty dispute, many warranties exclude damage from liquid or pet waste, so knowing the terms before you file saves time.
Frequently Asked Questions
How to clean a robot vacuum after dog poop?
First, unplug the vacuum and remove the dustbin and brushes. Wipe down the affected areas with a pet-safe enzymatic cleaner, then rinse removable parts with water. Allow everything to dry completely before reassembling. Check the filter and replace it if contaminated. For hard-to-reach spots, use a damp cloth or cotton swab. This prevents odors and bacteria from spreading on future cleaning cycles.
What is the average lifespan of a robot vacuum?
Most robot vacuums last between 3 and 5 years with regular maintenance. Pet owners may see shorter lifespans because pet hair strains brushes, filters, and motors. Following a consistent robot vacuum maintenance schedule, including filter replacement every 2 to 3 months and brush cleaning weekly, can help you get closer to the upper end of that range.
Are robot vacuums worth it if you have pets?
Yes, if you commit to maintenance. Robot vacuums reduce daily pet hair and dander on floors, but they need frequent brush cleaning and filter changes to stay effective. Pet owners who run their vacuum daily and follow a maintenance schedule get the most value. Skipping upkeep leads to tangles, lost suction, and premature breakdowns.
How often should I replace the brushes on my robot vacuum?
Replace roller brushes every 6 to 12 months, and side brushes every 3 to 6 months, depending on pet hair volume. Signs it's time include frayed bristles, persistent tangles, or visible wear. If you have multiple shedding pets, check brushes monthly and replace sooner. Keeping spares on hand avoids downtime and maintains cleaning performance.