

Table of Contents
- Why Ironing Feels Slow (And How to Fix It)
- Essential Tools for Efficient Ironing
- Match Temperature Settings to Fabric Types
- How to Iron a Dress Shirt in 3 Minutes
- Ironing vs Steaming for Speed: Which Wins?
- Fabric-Specific Speed Sequences and Wrinkle Prevention
- Frequently Asked Questions
Last Updated: September 29, 2026
Why Ironing Feels Slow (And How to Fix It)
Most people lose time on how to iron clothes before the iron even touches fabric. They heat up a cold iron, grab a random shirt, and fight wrinkles one slow pass at a time. Learning how to iron clothes quickly and efficiently starts with fixing that setup, not with pressing harder. Proper preparation also extends to the laundry cycle itself, as preventing clothes from shrinking ensures that your garments maintain their intended fit and shape long before they reach the ironing board.
WowHaul offers a curated selection of practical finds designed to simplify your everyday living. Speed comes from preparation and heat control, not muscle.
Here's the core problem.
The three biggest time killers:
- Ironing on a low setting, then reheating and starting over
- Working on a cramped board with no room to lay a full shirt flat
- Skipping the dampness step, so wrinkles fight back
Essential Tools for Efficient Ironing
A steam iron with strong steam output does the heavy lifting. The U.S. Department of Energy appliance guidance notes that heating and appliances drive a large share of home energy use, so picking one tool and using it well beats running several.
What actually matters:
- A steam iron with an adjustable temperature dial
- A sturdy ironing board at hip height
- A spray bottle for spot dampening
- Distilled water in the reservoir to avoid mineral buildup
Match Temperature Settings to Fabric Types
Match the dial to the fabric:
| Fabric Type | Heat Setting | Steam | Speed Tip |
|---|---|---|---|
| Linen | High (highest dial mark) | Heavy steam | Press while damp; linen relaxes in one pass when wet |
| Cotton | High | Heavy steam | Iron slightly damp; starch only if you need structure |
| Wool | Medium | Light steam | Use a pressing cloth; never rest the iron in one spot |
| Silk | Low | Dry or light | Press inside out; test on an inside seam first |
| Synthetics (polyester, nylon, acetate) | Low | Little to none | Keep the iron moving; heat marks are permanent |
The descending-heat sort (the part most guides skip):
- Start with linen and cotton while the iron is at its hottest. These are the fabrics that need maximum heat, and they are also the ones that take the longest per garment, so you want the iron at full temperature for them.
- Move to wool as you finish the naturals. By now the iron has been running a while; dial it down one step and let the residual heat carry the first few passes.
- Finish with silk and synthetics on the lowest setting. The iron is already warm, so you are not waiting for it to heat, you are just dialing down, which takes seconds.
- Unplug and let the iron cool on the board, not upright in a cabinet, so you are not tempted to rush the cooldown and scorch the next item.
A note on steam and temperature together: steam is most effective at high heat, because the water flashes to vapor on contact and relaxes fibers fast. On low heat, steam tends to sputter and leave water spots instead of smoothing. If you are ironing synthetics, switch the steam off entirely and rely on a light mist from a spray bottle instead.
How to Iron a Dress Shirt in 3 Minutes
A dress shirt in three minutes is realistic if you work in the right order, keep the iron moving, and never backtrack over a section you already finished. The trick is to press each section once, in a sequence that avoids re-creasing finished parts.
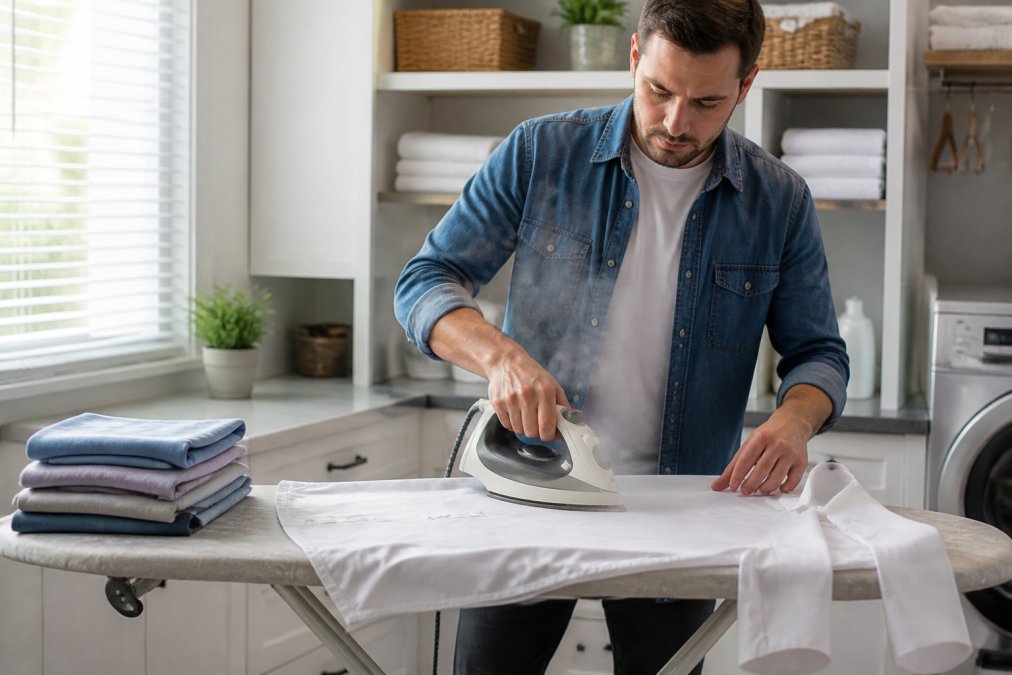
Before you start (30 seconds):
- Set the iron to the cotton/high setting and let it come to full heat while you prep the shirt.
- Mist the shirt lightly with a spray bottle, slightly damp, not wet. Damp fabric relaxes in one pass; dry fabric fights back.
- Lay the shirt flat on the board with the collar at the narrow end, so you are not dragging the body around as you work.
Follow this order:
- Collar first (about 20 seconds). Press from the points inward toward the center, then flip and press the other side. Working from the points in prevents the collar from stretching out of shape.
- Cuffs and sleeves next (about 40 seconds). Use the board's narrow end. Press the cuff flat first, then run the sleeve along the narrow end, smoothing the seam with your free hand as you go. Do both sleeves before moving on.
- Yoke and shoulders (about 20 seconds). Drape the yoke over the narrow end and work the iron around the curve. This is the section most people skip, and it is the one that shows under a jacket.
- Back panel (about 30 seconds). Lay the back flat and use long, smooth passes from the center outward. Do not press down hard, let the heat and steam do the work.
- Front panels last (about 40 seconds). Work around the buttons rather than over them. Press the placket flat, then the body panels, then the pocket area if there is one.
- Hang immediately (10 seconds). Put the shirt straight on a hanger and button the top button so the collar holds its shape as it cools.
Ergonomic setup that keeps you fast:
- Set the board at hip height so your forearm is roughly parallel to the floor when the iron is on the fabric. A board that is too low forces you to bend, which tires your back within a few shirts.
- Keep the spray bottle and a hanger within arm's reach on the side of your dominant hand. Reaching across the board for a hanger costs a few seconds per shirt.
- Stand with your feet shoulder-width apart and shift your weight rather than twisting at the waist. Twisting is what makes a full basket feel like a workout.
- If you iron sitting down, raise the board so your elbows stay at roughly 90 degrees. A low board plus a chair is the fastest route to a sore neck.
Ironing vs Steaming for Speed: Which Wins?
Steaming wins for quick touch-ups. Ironing wins for crisp, sharp results. The right pick depends on the garment and how much time you have.
Quick comparison:
| Method | Best For | Speed | Finish |
|---|---|---|---|
| Steam iron | Shirts, cotton, linen | Fast with setup | Crisp and sharp |
| Garment steamer | Delicates, suits, drapes | Fast, no board | Soft, relaxed |
| Dry iron | Synthetics, craft work | Medium | Flat, no shine |
Fabric-Specific Speed Sequences and Wrinkle Prevention
Wrinkle prevention starts in the laundry routine, not at the board. The American Cleaning Institute fabric care resources points out that how you wash, dry, and store a garment shapes how much pressing it needs.
Prevent creases before they form:
- Shake garments out the moment the washer stops
- Dry on low heat and pull items out slightly damp
- Hang or fold immediately after drying
- Avoid overloading the dryer, which packs in creases
A simple weekly sequence that saves time:
- Sort the load by fabric weight, not by color alone
- Iron cottons and linens first at high heat
- Move to wool, then synthetics as the iron cools
- Hang finished items straight on hangers
Frequently Asked Questions
What is the fastest way to iron a shirt?
Start with a damp shirt and a preheated iron on the correct temperature setting. Iron the collar first, then cuffs, sleeves, back, and front panels. Use steam output to relax fibers faster and avoid backtracking over areas you already pressed. Keeping the ironing board at hip height reduces fatigue so you maintain steady speed through the whole shirt. A garment steamer works well for light wrinkles, but a steam iron gives a sharper professional finish on cotton and linen.
Does using a spray bottle help with ironing?
Yes. Lightly misting dry fabric with water before pressing helps wrinkles release faster because damp fabric conducts heat more evenly. Spray cotton and linen directly, but use a pressing cloth or the spray function on heat-sensitive fabrics like silk and synthetic fibers. Too much water can cause spotting on some materials, so a fine mist is enough. Pairing a spray bottle with your iron's steam function covers both stubborn creases and quick touch-ups.
Can I iron clothes without an ironing board?
You can press clothes on a folded towel placed over a table, but the results are slower and less consistent. An ironing board provides a firm, heat-resistant surface at the right height, which improves heat distribution and reduces back strain. If space is tight, look for a compact tabletop board or a heat-resistant mat. Without a board, work in small sections and keep the fabric taut to avoid new creases forming as you go.
How do I prevent wrinkles while ironing?
Iron in the right order: collars, cuffs, sleeves, then body panels. Hang each garment immediately after pressing so it cools in shape. Avoid overloading the board and don't press creases back into areas you already finished. For synthetic fibers, lower the temperature and use vertical steaming to finish. Let garments cool completely on the hanger before wearing or folding, since warm fabric creases easily when compressed.
Ironing a full basket still feels like a chore when your tools and setup work against you. WowHaul curates practical finds built for stronger routines, from everyday care products to items that simplify home life. Browse the WowHaul collection to find tools that cut your ironing time and keep your mornings calm. Get started with WowHaul and build a laundry routine that runs itself.